
Build my Jekyll blog with bare GitHub Actions
I use Jekyll to create my blog. It allows me to focus on writing the content with markdown and afterwards to generate a static HTML page that can be published easily.
Next to Jekyll there are three additional components, all provided by GitHub:
- source control for the raw blog content
- generating the static page with GitHub Actions
- hosting the generated static page with GitHub Pages
Of course, there are many other options if you don’t prefer GitHub. You could also distribute these components to different providers. However, I like the simplicity and completness of GitHub. Additionally, GitHub is free of charge for my purposes.
You can check out the final results in my public repository. No worries, we’ll walk through the necessary steps.
1. Create Jekyll page
This is not a blog post about Jekyll, they provide a good documentation. Just have a look at the Jekyll Quickstart to get started with Jekyll.
2. Push Jekyll page
Push the newly created Jekyll page to the master branch of a newly created GitHub repository.
In this example we’ll use the master branch for the raw Jekyll page, it’s the branch where I commit and push all the changes I make. In contrast to that, the gh-pages branch will contain the automatically generated static HTML page where only the GitHub Action will push into.
3. Add the GitHub Action
A GitHub Action is a list of commands that will be executed after an event occurs, such as a new commit. It needs to be defined as a yaml file inside the .github/workflows folder of the repository. In our case, the GitHub Action is the important piece that is responsible for generating the static page out of the Jekyll source.
Additionally, I don’t want to rely on any third-party marketplace Actions. They might be orphaned after some time or contain unwanted side-effects. So, I’ll just use the Actions and commands provided by GitHub itself.
In contrast to automate the workflow by utilizing a GitHub Action, you could manually run jekyll build on your local machine and upload the _site directory to a server every time you make changes to your blog. Basically, the GitHub Action will do the same, but it will take the burden for this boring recurring task.
You can see my complete GitHub Action here.
To be clear, the following steps are necessary:
- Checkout the
masterbranch - Install Ruby and the dependencies from the
Gemfile - Run
jekyll build - Push the generated HTML files to the
gh-pagesbranch
Let me walk you through the important steps:
Checkout
- name: checkout master
  uses: actions/checkout@v2

- name: checkout gh-pages
  uses: actions/checkout@v2
  with:
    ref: 'gh-pages'
    path: 'gh-pages'
Both branches, master and gh-pages, will be checked out so that the gh-pages branch resides in the subfolder gh-pages. Later on, Jekyll will write its output into this gh-pages folder.
Install Ruby and dependencies
- name: setup ruby
  uses: actions/setup-ruby@v1
  with:
    ruby-version: 2.7

- name: cache gems
  uses: actions/cache@v2
  with:
    path: vendor/bundle
    key: ${{ runner.os }}-gems-${{ hashFiles('**/Gemfile.lock') }}
    restore-keys: ${{ runner.os }}-gems-

- name: bundle install
  run: |
    bundle install --path=vendor/bundle --jobs 4 --retry 3
    bundle clean
The three steps should be quite self-explaining. setup ruby takes care that ruby will be available for future steps and bundle install will install all gems as defined in the Gemfile.lock.
The caching might not be obvious: It takes about three minutes to install all dependencies from scratch. But what if we could save this time by re-using the installed gems from a previous run? That’s exaclty what the cache gems step does. After each run of the GitHub Action it takes the folder vendor/bundle, puts that into a zip-archive and restores it before the next run. We just need to make sure that bundle install also uses the folder vendor/bundle for storing the gems. This will bring the build time down from over three minutes to less than thirty seconds.
Build the static page
- name: jekyll build
  run: JEKYLL_ENV=production bundle exec jekyll build --destination gh-pages
Thats the main step in our GitHub Action, it actually takes Jekyll to generate the static HTML page. Please note that we specify the gh-pages folder as the destination for the jekyll build step. Remember, that we checked out the gh-pages branch from our repository into this gh-pages folder.
Push the generated static page
- name: push gh-pages
  run: |
    cd gh-pages && \
    git config user.name "${GITHUB_ACTOR}" && \
    git config user.email "${GITHUB_ACTOR}@users.noreply.github.com" && \
    git add . && \
    git commit -m "jekyll build from Action ${GITHUB_SHA}" && \
    git push
We’re switching into the folder gh-pages which has been created based on the branch gh-pages and which contains the latest changes to our static page from the last jekyll build. This step just commits and pushes any changes in this folder to the gh-pages branch to get the static page that we can publish on the web. Actually, this step creates the HTML pages shown to a blog visitor.
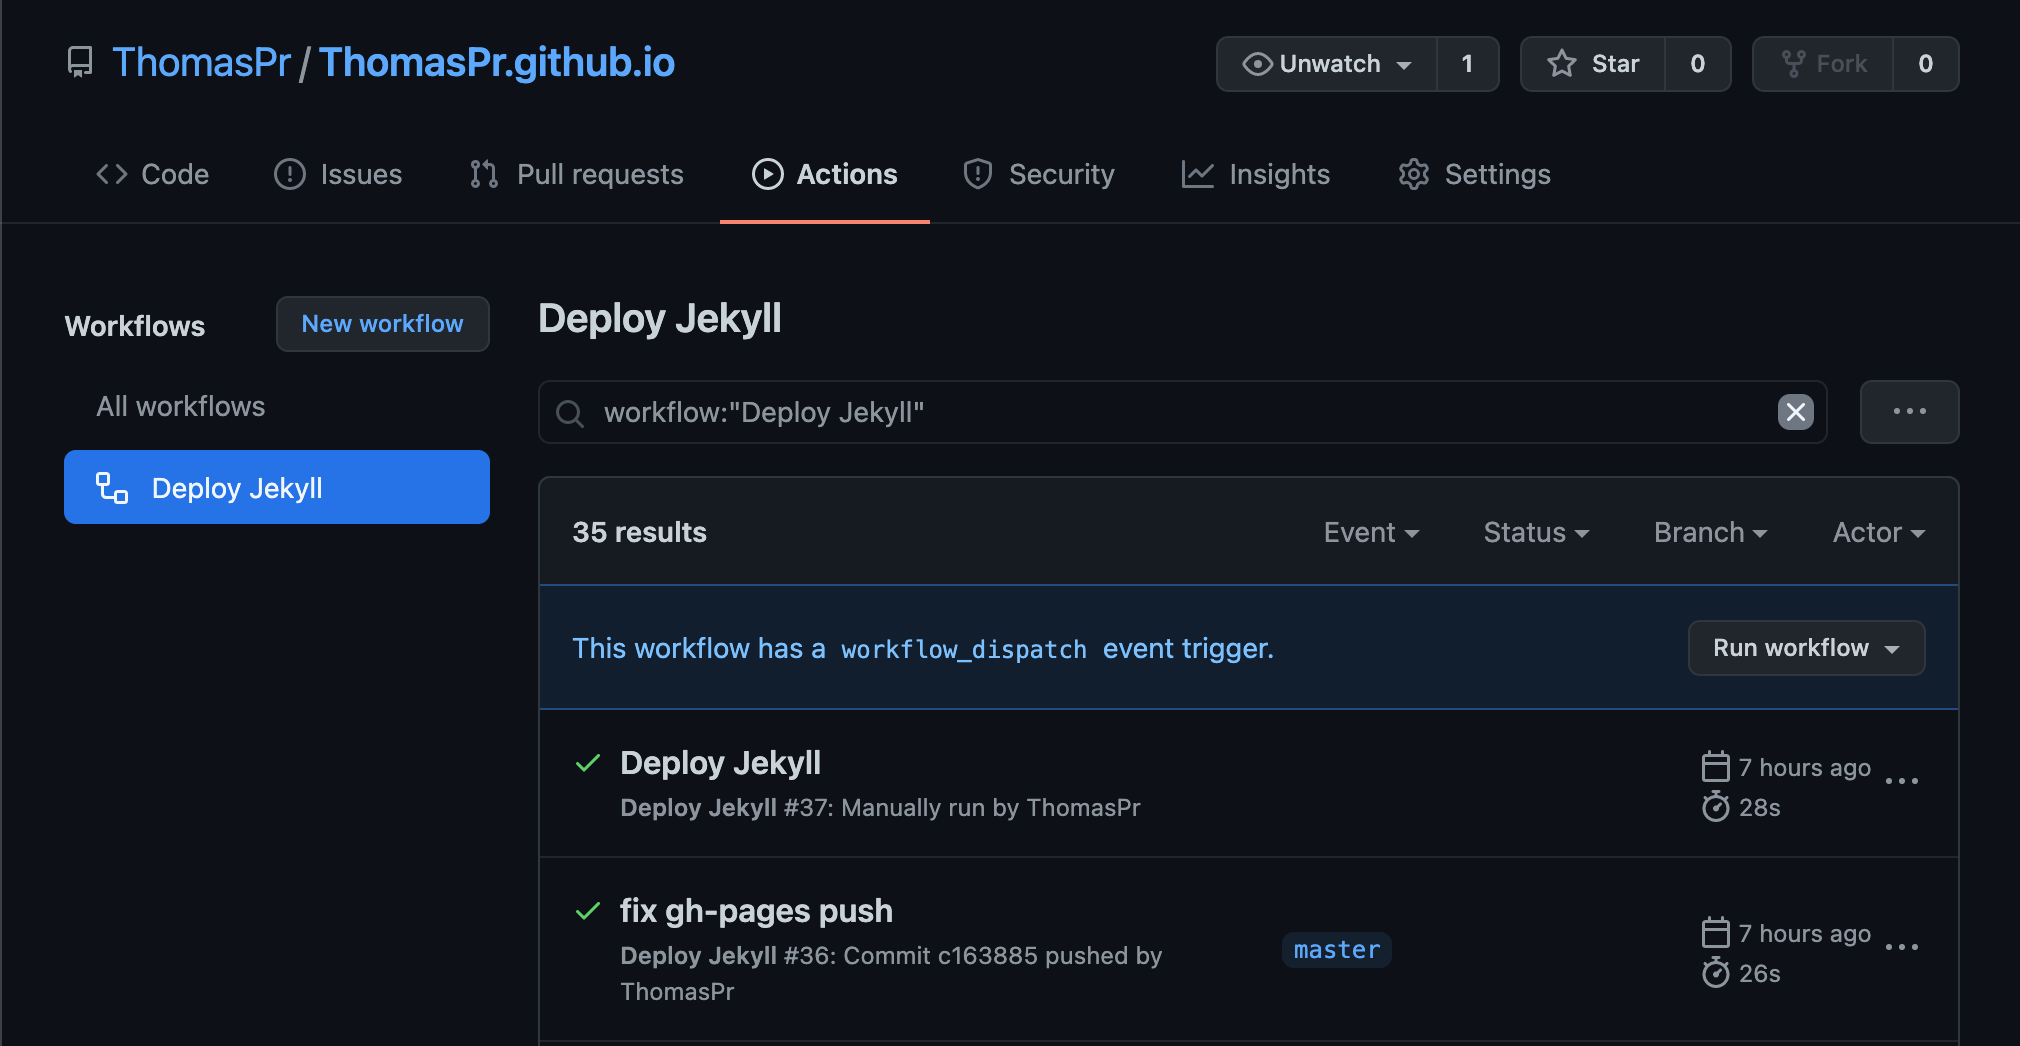
See the GitHub Action in action
Once you committed and pushed this workflow-file into the master branch the GitHub Action should be executed. To verify that, click on the Action tab of your Repository and see your newly created Action. The first run can take a couple of minutes.
4. Enable GitHub Pages
The last task is to enable the hosting of the generated static page content. Just make sure that the GitHub Action has been completed successfully before you continue.
To enable GitHub Pages for your repository open the Settings tab and scroll down a little bit. You should see a section named “GitHub Pages”.
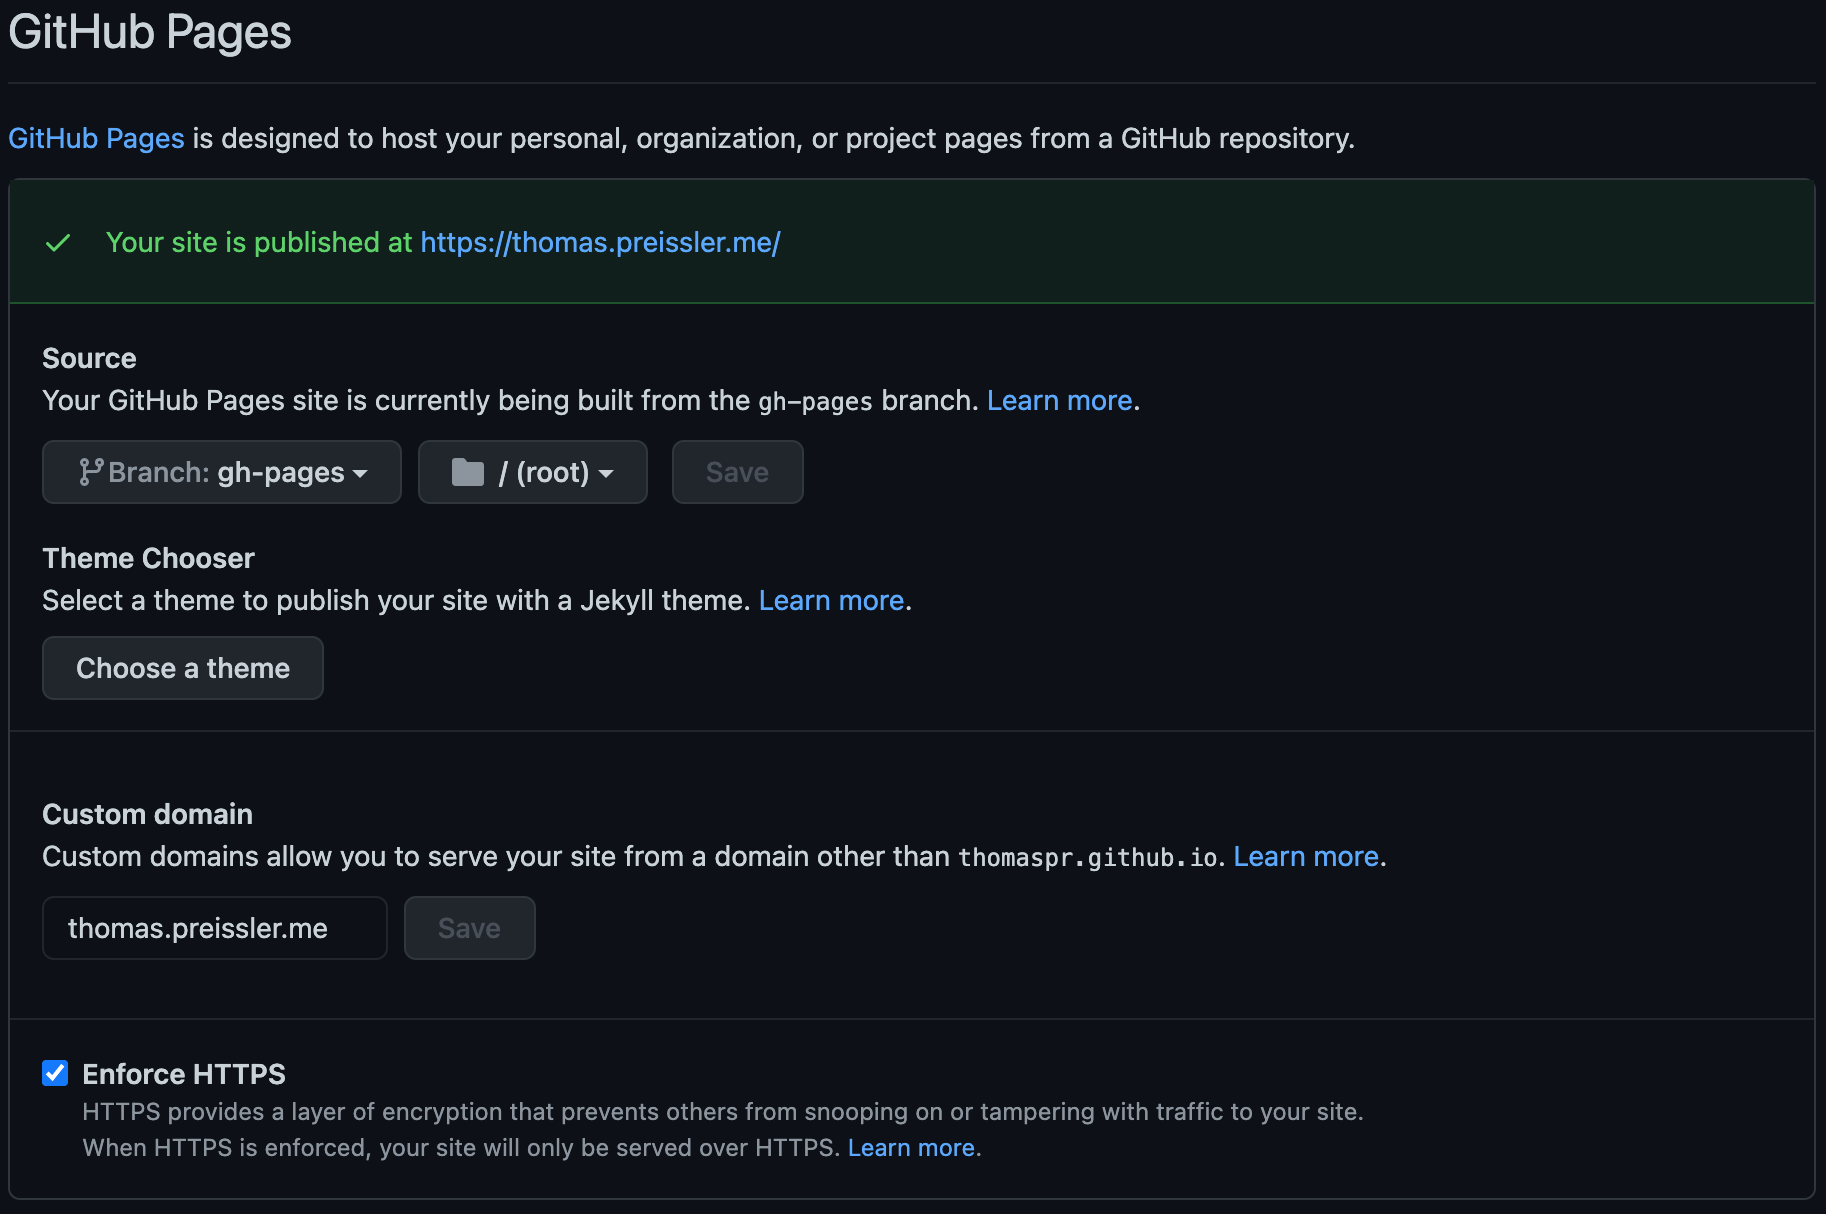
The only required setting is to change the Source to the gh-pages branch. But I strongly recommend to also enable the “Enforce HTTPS” setting.
Thats it. The blog is up and running. Every time I push a change to my blog, the GitHub Action is triggered and the updated static HTML page is published.